Friendly Zipper *
Let’s create a zipperific masterpiece together.
If you prefer to watch first, video is at the end of this post 📽️
Stamp: Your choice sentiment. I used Simply Said 163756
Paper: [card stock] Misty Moonlight, Petunia Pop, white
[design papers] Floral Impressions 165603; for “shirt,” any design paper primarily Misty Moonlight color – Country Lace 163415 has a nice one
Ink: Misty Moonlight
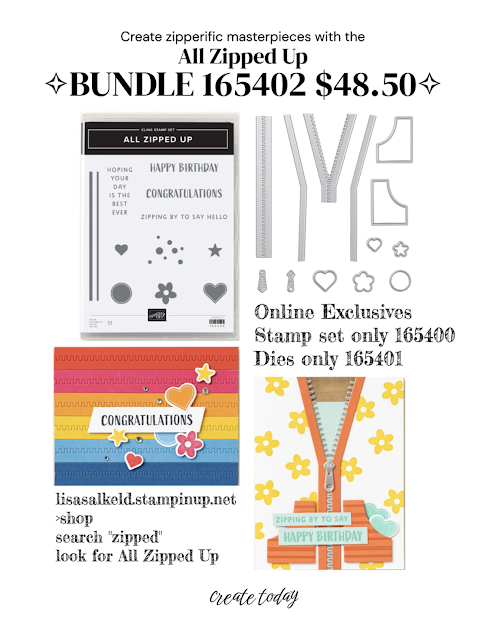
Et cetera: [dies] All Zipped Up 165401; circles, I used Spotlight on Nature 163580 [punches] 2” circle 133782 àFour circle punch sizes currently offered by Stampin’ Up- 2-3/8, 2, 1-7/8, 1-3/4
Surplus ❀ 1/8 woven ribbon in white
Techniques: Using nesting dies to make frames (sentiment) and die cut piecing (zipper),
See this card on the blog: https://stampyandscrappy.blogspot.com/2025/05/friendly-zipper.html
See this card on YouTube: https://www.youtube.com/watch?v=E_0QYYQREBg
Color Coordination: card stock and papers: Floral Impressions rainbow: Fresh Freesia, Strawberry Slush, Pretty in Pink, Pecan Pie, Crushed Curry, Peach Pie, Old Olive, Darling Duckling, Garden Green, Pool Party, Misty Moonlight
Measurements and directions
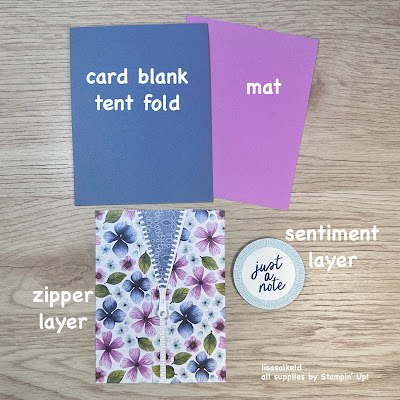
Finished card is 4-1/4 x 5-1/2
*card blank is an A2 tent fold
*mat is Petunia Pop card stock 4-1/8 x 5-3/8
*design paper, Misty Moonlight “shirt” 4 x 5-1/4
*zipper die cut pieces: floral paper “sweater” and white card stock zipper
*design paper, Pool Party circle frame, use in sentiment stack
*(2) 2” punch circles white card stock, use in sentiment stack
*sentiment stack 2-1/8 die cut circle frame attached to stamped circle. Make a sandwich
with the other circle using foam dimensionals
*embellishments – 1/8-inch white woven ribbon for zipper pull
*white card stock inside writing 2-3/4 x 4-1/4 with scrap design strip 3/4 x 4-1/4
Card blank Score 4-1/4 x 11 card stock in half at 5-1/2 and fold on the top. Misty Moonlight.
Build zipper layer
__Use trim dies to cut “sweater” from floral paper. I taped the trim pieces together for easier die cutting.
__Use zipper dies (two pieces) to cut zipper from white card stock. Tape or glue the pieces together, making a Y shape. If using a tape runner, add a little tape to both pieces for tape-to-tape adhesion. Should be a bit stronger compared with adding tape to only one side.
__Attach “sweater” and zipper pieces to Misty Moonlight paper. Nudge zipper angle into sweater angle for best fit. Gap(s) may be present. Not to worry, they will be covered.
__Trim excess as needed.
__Attach trim pieces and zipper pull. I found it easiest to attach left trim piece and then the zipper pull, nudging it slightly under the trim at the center of the Y. Then simply add the right trim piece, allowing it to sit slightly atop the right side of the pull. Adding the left trim first makes it easier to properly place the zipper pull. I centered mine at with the angles and placed it over the seam in the Y.
Build sentiment layer
__Punch (2) 2” circles from white card stock. Stamp desired sentiment on one.
__Make circle frame using circle dies and Pool Party design paper. Frame sentiment.
__Stack the circles with foam dimensionals between layers.
From top to bottom:
Sentiment layer stacked circles
Zipper layer including Misty Moonlight “shirt,” floral “sweater,” zipper and finishing trims
Petunia Pop mat
Misty Moonlight card base
Twinkle Tip✧
Using tape runners in card making and scrapbooking is quick and efficient and sometimes preferred over glue alternatives for convenience. The downside is that often the tape just doesn’t seem to hold well. The secret is in the technique - try tape-to-tape. To create a more robust bond, remember to add tape to both pieces being adhered together. Adding tape to both pieces before joining together, tape-to-tape, improves effectiveness of the adhesive.


Comments
Post a Comment
It's awesome you're here. Thank you for visiting Stampy and Scrappy! (✿◠‿◠)❤